
If you are like me, you have many pet projects that you want to do in your spare time. Also if you are like me, you want to be able to work through issues from anywhere at anytime from any machine. Luckily there’s AWS for that!
Some of the projects I am working on involve web scraping, data wrangling and other activities that are easy to do in a jupyter notebook.
This video tutorial is based on a fantastic walk through by Alex Sanchez. I add on a little bit to what Alex did to make firing up your notebook, quick, easy and cheap.
In order to get started, follow the steps below. You will need to open up an AWS account. create an IAM role, create an S3 bucket, and download account credentials. Once that is complete, feel free to jump in and follow along with the video to get up and running! With your notebook running on EC2, you can access your notebook and code from anywhere and finally finish those pet projects!
Getting Started:
Open up an AWS account. Please note you will need to set up a payment profile in order to fully activate your account. What we are building will be mostly free and depending on your usage will cost less than $5 per month.
Create an IAM role
Roles allow AWS services to “talk” to one another. This role we are setting up is going to let our EC2 instance, talk to our S3 bucket.

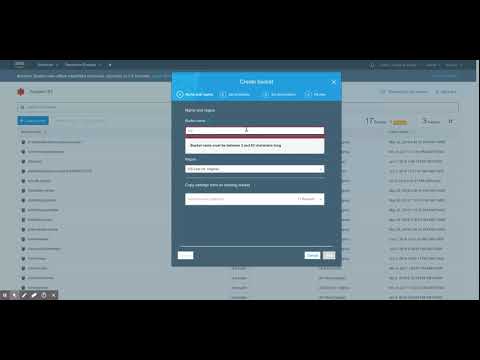
Create S3 Bucket:
We are going to create an S3 bucket to store our notebooks. Please note your S3 bucket has to be a unique name that has never been used before. Video:
Download Keys for user:
Amazon recommends doing a few things to increase security on your account. One of those things is to create a user for yourself and apply permissions. Feel free to complete this if you want. However, this video will not walk you through that. In this step we are just going to download access keys to use later. It is fine to do this with the default user that is set up.

Create apemkey:
This step will automatically download your .pemfile. Please note where you store this file as we will need it to connect to our instance. If you are a windows user, you will need to complete the next step as well in order to use the key.

Windows Users: download and install Putty:
Please use the attached link for instructions on installing Putty. Please then use the “convert a key” section to convert your .pemkey, created in the last section into a .ppkfile
Now the fun part!!
Code to generate key
Sudo openssl req -x509 -nodes -days 365 -newkey rsa:1024 -keyout mycert.pem -out mycert.pem
Configure the notebook
c = get_config()
# if you want plotting support always in your notebook
c.IPKernelApp.pylab = 'inline'
#point it to the cert file we created
c.NotebookApp.certfile = u'/home/ec2-user/certs/mycert.pem' #location of your certificate file
#allow all IP addresses
c.NotebookApp.ip = '*'
#Do not open in 'browser'
c.NotebookApp.open_browser = False
#Enter the SHA we previously created so that your notebook is password protected
c.NotebookApp.password = u'PASTE SHA HERE'
# This is the port we opened in our security group
c.NotebookApp.port = 8888
This is the code you need when creating backup.sh
#!/bin/sh
aws s3 sync notebooks/ s3://YOURBUCKETNAME --exclude '*' --include '*.ipynb'
aws s3 sync s3://YOURBUCKETNAME notebooks/ --exclude '*' --include '*.ipynb'</pre>
Bonus content!
At the end of the video I added some ‘advanced details’ to our launch routine. I forgot one important piece of code. This is the code you want to use
#!/bin/bash<br />
sudo yum update -y<br />
aws s3 sync s3://YOURBUCKETNAME notebooks/ --exclude "*" --include "*.ipynb"


Comments